
How to Use a Soda Can Stove
- Before you cook
- Lighting the Stove
- Using the Simmer Ring
- Using the Snuffer
- Don’t Be Stupid
- Stove Fail?
1. Before You Cook
When you use a stove, you are using the heat from a small, controlled fire to cook and warm your food. The key term here is to make sure your fire stays in control—a fact I can’t stress enough. Irresponsible hikers have started grass fires in the past which never benefits the hiking community at large. So before lighting your stove, take these sensible precautions:
- Clear a surface to cook on that won’t catch fire.
- Make sure there are no flammable materials near your cooking area.
- Look for a location that has a natural wind break. It not only makes it easier to cook, but it’s safer too.
- Always have a full bottle of water nearby as your emergency fire extinguisher.
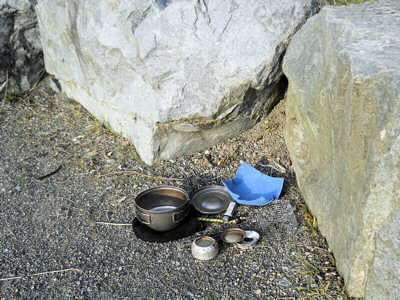
- Make sure all of your food, pots, pans, utensils and other accessories that you’ll be using are in easy reach.
2. Lighting the Stove
To start, pour the denatured alcohol into the main opening of your stove, filling the stove about halfway for a 10 (or so) minute burn time. As you gain experience with your stove, you’ll probably adjust the level of the fuel to suit your purposes and situation, but to start with, fill the stove about halfway.
Then light the fuel. Be careful—in daylight, the flame is nearly invisible and you’ll have to listen for a small ‘puff’ as the vaporized gas ignites. As soon as you hear it, get your hand away quickly. On cold mornings, you’ll need to get the flame of your lighter practically on the surface of the fuel to get ignition. If lighting the stove is difficult because the fuel is so far down in the stove, it sometimes helps to hold the stove in your less dominant hand (left, for most people) at a slight tilt to get the fuel higher up the side of the stove and light the fuel at the high edge. If you’ve spilled any fuel at all along its exterior, though, don’t do this! You don’t want to catch your left hand on fire!
Once the stove is lit, repeat after me: Never leave a burning stove unattended. Everything you need to cook your meal should be within easy reach, and you should absolutely never, under any circumstances, leave your lit stove unattended. Never add additional fuel to an already-burning stove.
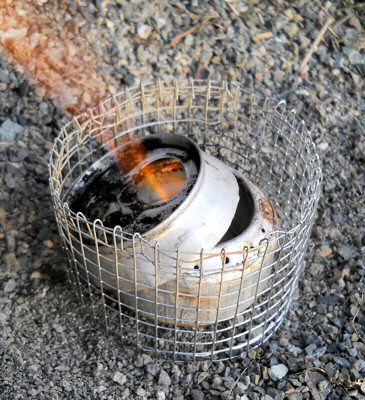
If you built the soda can stove, you must use a pot support! Set it around the stove and start cooking!
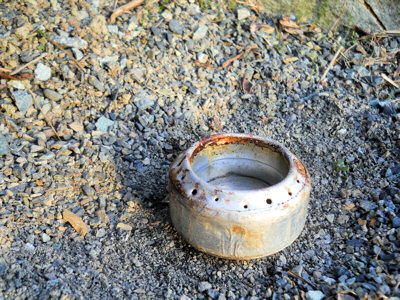
It will take your stove about a minute to completely warm up, but you can start cooking immediately. Don’t worry about the jets around the lip of your stove catching fire—that will happen automatically as your stove warms up.
The first couple of times you light a new stove, you might find the adhesive on your high-temperature tape catches fire along the exposed edges, especially at the top of the stove where it comes into direct contact with the flame. This is normal and nothing to worry about, but after the fuel burns off, you’ll want to use your fingernail to rub the tape securely to the stove where it might have loosened.
If you built the cat food can stove, you can set your pot directly on the stove—but wait until the stove has fully warmed up before doing so since putting your cooking pot on the stove immediately will likely extinguish it.
3. Using the Simmer Ring
Before using a simmer ring, wait until your stove is fully warmed up which takes a minute or two after the stove has been lit. If you try to put a simmer ring on immediately after lighting the stove, you’ll snuff out the flame. Since most products have you bring your meal to a boil then simmer for 10 or 15 minutes, your stove will already be at normal operating temperatures when it’s time to simmer.
The trickiest part in using a simmer ring is getting it on the stove in the first place. By now, your stove is quite hot, so it’s a lot like a game of ring toss where you try to drop the simmer ring onto the top of the stove. Move the simmer ring as close to the stove as you can, then drop it into place as best you can. Most likely, the simmer ring will bounce off at an angle, at which point you’ll need a stick or utensil to shift the simmer ring into its correct position.
In my photos, you’ll see the top of my simmer ring is quite black. That’s because I usually use the spoon I’ve been stirring my meal with to shift the simmer ring into place, and the food on the spoon burns onto the simmer ring. Whatever works for you, though.
Without the simmer ring, a half-full stove will burn for 10 to 15 minutes. With a simmer ring, the same amount of fuel will easily burn for as long as two hours. It doesn’t take much fuel to simmer!
Most of the time, you’ll want to use the simmer ring to simmer food—Hamburger Helper, mac ’n’ cheese, or whatever floats your boat. If you want to try to get creative, though, you can use it to bake food instead. I’ve made pizzas doing this, including the freshly made dough. It’s not particularly easy or fast, however, and if you want to bake often, you’ll find it easier to do with commercial stoves.
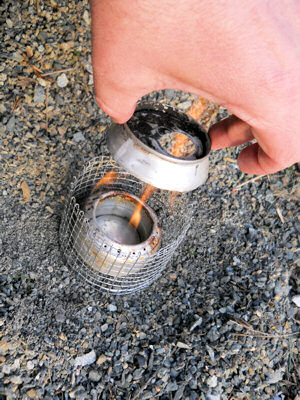
4. Using the Snuffer
Most of the time, you should just let any excess fuel from your stove burn off. It’s just easier that way, and who wants to carry excess fuel anyhow? If you used the simmer ring, take the simmer ring off with a stick or utensil to speed the time it takes to burn off the excess fuel.
But if your fuel is running low or you’re in a hurry to clean up and get moving, you’ve got the snuffer to help. You’ll have to play the ‘ring toss’ game like you would with the simmer ring to get the snuffer on the stove. Most likely, it’ll come to rest at an angle and not actually snuff the flame. Use your stick or utensil to nudge it into place.
If you’re using a simmer ring, it is possible to snuff out the flame without taking off the simmer ring by using the snuffer upside-down. Personally, I find it easier just to take off the simmer ring first.
If the stove is fully warmed up, this usually isn’t enough to snuff the flame—there’s not an airtight seal around the edges of the snuffer. Sometimes tapping the snuffer with a stick creates the seal needed to snuff the flame, or you could try to blow it out like a candle. If all else fails, it’s time for the big guns: water. Pour some water on the snuffer. Just a little bit will do.
Water will always snuff out the flame, and has an added benefit of cooling down the stove quicker as well. Because the snuffer covers all of the holes in the stove, none of it will mix with the fuel in the stove, but it’s very effective in putting out the flame. Just be careful while taking off the snuffer than any of the water that pooled in the middle of it doesn’t fall into the fuel.
Wait for the stove (and fuel!) to cool before trying to save any of it. To pour the fuel back into your fuel bottle, it helps to have a fuel bottle with a wide mouth or a funnel. Using your simmer ring as a cheap funnel can help recapture more of the denatured alcohol, but don’t worry too much about the fuel that dribbles down the outside of your fuel bottle. It will evaporate quickly. Don’t put it near an ignition source, though—at least not until the fuel has evaporated completely!
5. Don’t Be Stupid
Alcohol stoves get hot when you use them. Don’t touch them when it’s burning, and wait a few minutes for it to cool after the flame goes out before trying to touch or move the stove. This might seem obvious, and it should be, but I’ve seen people try to pick them up immediately after the flame goes out and end up with red fingertips for their trouble. The pot support, simmer ring, and snuffer can also get quite hot during use so let them cool for a few minutes before trying to handle anything.
6. Stove Fail
Does your soda can stove not work as expected? Check out our troubleshooting page. I’ve started collecting problems that people have experienced and what may have been the reason for the fail.