
A Backpacker’s Cookset
I get a lot of questions about the cookset I use while backpacking. This is what I use, but I make no claims about this being the “right” or “wrong” way to do this. Do whatever works best for you. This is what works best for me, and I like the system.
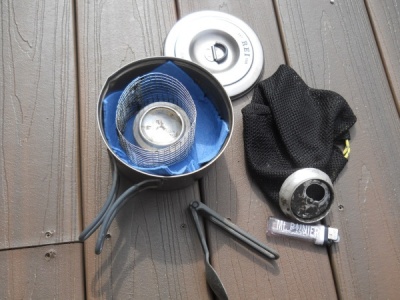
So here’s my little cookset. If it looks worn and dirty, that’s because I most recently carried it on my thru-hike of the Pacific Crest Trail. This cookset has history. This cookset has seen a lot of action!
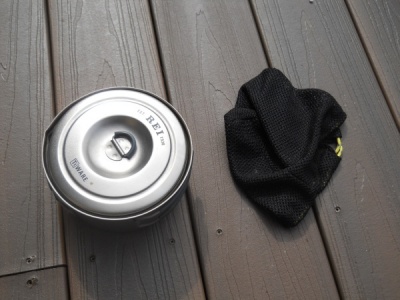
Titanium Pot
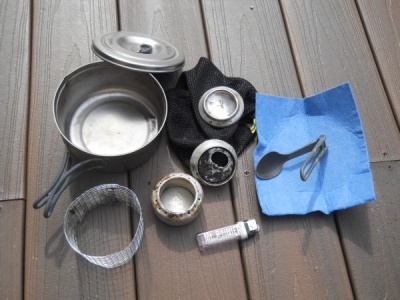
Dish Cloth
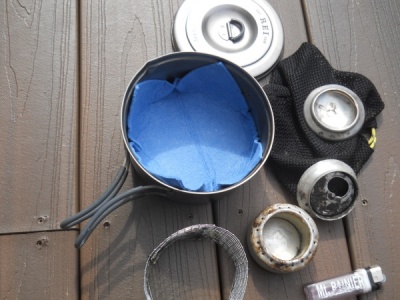
I like a little rag to dry my pot when I’m done cleaning it. I also use it to hold the pot in my hand without burning myself when eating out of it. My rag is an “MSR Packtowl Original”— that I cut to size, but use anything that works for you. Except cotton, which takes forever to dry.
When packing my cookset, I put it in the pot first to protect the bottom of the pot from scrapes (especially from the pot support) and so the cookset doesn’t rattle around so loudly in my pack.
Weight: 0.5 ounces
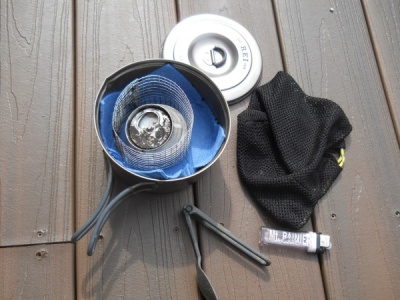
Pot Support
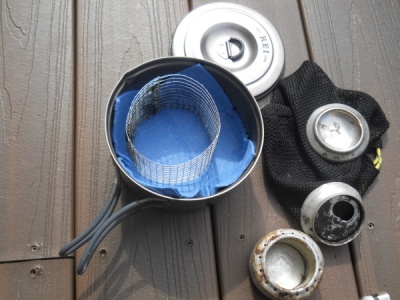
Next, I put in the pot support. I try to keep it off to the side so there’s room on the other side for the lighter and spoon which are too large to fit in the center of the pot support. If your pot is bigger than mine, however, this might not be an issue.
I like my pot support. It’s lightweight. I made it myself. But it’s fragile, so it really needs to be stored in the pot to be safe from the pounding it would otherwise get in my pack.
Weight: 1.0 ounce
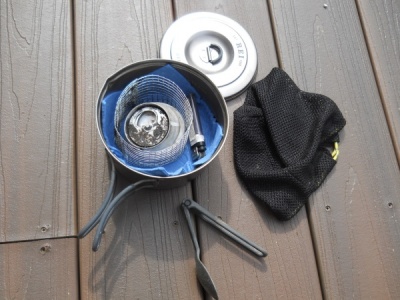
Soda Can Stove
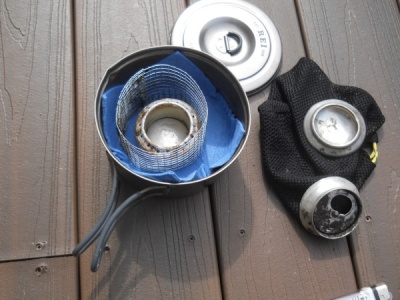
Next in goes the soda can stove. It fits snugly in the pot support. The soda can stove can be quite fragile as well without protection, but the pot will make sure it doesn’t get crushed in your pack.
Weight: 0.5 ounces
Snuffer
The snuffer fits well right on the stove. I don’t really use it very often preferring to let a stove burn through the fuel, but on rare occasions when I’m running low on fuel, I’ll use it to put out the stove immediately when my food is done.
Weight: 0.25 ounces
Simmer Ring
The simmer ring fits like a glove over the snuffer. (Note, however, that the snuffer does not fit very well over the simmer ring, which is why the snuffer always goes in before the simmer ring.)
Weight: 0.25 ounces
Lighter
I don’t carry matches—lighters seem easier and more reliable to use. On rare occasions, I use lighters to start campfires or burn the ends of a cut rope, but I’m always in camp during those scenarios anyhow, so I store my lighter in the cookset. If you use lighters more often—especially if you’re a smoker—you’ll probably find it more convenient to store it in a more readily accessible location. Since the lighter is too big to fit inside my pot support, I fit it on the side instead.
When picking out a lighter, pick the kind that’s clear enough to see how much fuel is still in the lighter. When it starts running low, replace it.
Weight: 0.5 ounces
Spoon
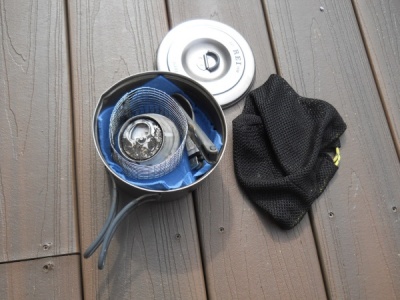
For utensils, I like to go light. I carry the one, fold-up spoon and that’s it. I used to carry a spork—a spoon and a fork in one does double duty! Except that I never used the tongs on a spork—and it took me until the end of a thru-hike of the Appalachian Trail to realize that. I just needed a spoon, and one that folded in half worked great since it would fit into my pot. If you do buy one that folds in half, make sure the spoon closes “inward” rather than “outward”. Nothing’s worse than a heaping pile of mac-n-cheese on your spoon and watching it drop onto the ground when the hinge can’t support the weight of the food in the spoon!
Weight: 0.5 ounces
Condiments

While not shown in this sequence, I sometimes like to carry condiments. I’ll throw them in a Zip-Lock bag and throw it into the cookset as well at this point. This little condiment package includes mustard, mayonnaise, tabasco sauce, salt and pepper, but there are a lot of other options available! Other packets I’ve seen include honey, soy sauce, parmesan cheese, red pepper and even jelly. You can also pack herbs and spices for your meals at this point. Just fit it them in wherever there’s room!
Practice safe eating! Use condiments! =)
Weight: variable
Windscreen
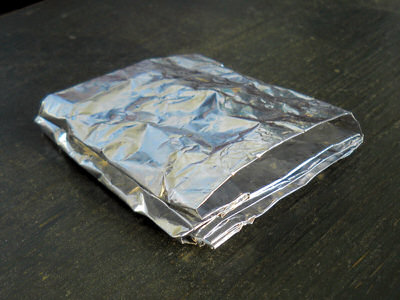
For years I never used a windscreen. If was windy out, I’d set up my stove behind a log or set up a series of rocks around my stove to break the wind. Sometimes I’ve even just cooked with the wind to my back so I could use myself as a wind break. I’ll readily admit none of these are as good as a true windscreen, and if the wind was really bad, I’d often just eat food that didn’t require cooking.
But when I made this website, I figured I should get more experience with actually using a windscreen and it’s grown on me. Folded flat, this homemade windscreen fits just fine on top of everything else in my pot.
Weight: 0.5 ounces
Lid
I rarely use the lid while cooking even though it’s supposed to help food cook quicker. If you do use it for that purpose, great. If not, you’ll still want it if for no other reason to protect the contents of your cookset while banging around in your pack.
Weight: 1.5 ounces
Bagging It!
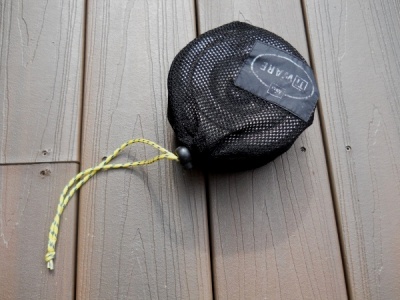
Then the whole thing goes into the bag to keep it all together. This bag came with my pot, but if you need to find something for your pot, look for something that’s not cotton (it takes forever to dry!), and a mesh net selection isn’t a bad idea. I often pack up when my dish cloth or spoon is still damp and it’s more likely to dry if the bag isn’t waterproof. Also, there’s a toggle to keep this bag closed, but toggles are heavy. All else being equal, pick a bag without a toggle.
Weight: 1 ounce
And there you have it—my cookset which has rattled around in my pack for thousands and thousands of miles, and will be with me for thousands more in the future!
Total Weight: 9.5 ounces
I only use one small pot. A lot of “backpacking” cookware comes with nested pots, pans and even a little drinking cup. They’re wonderful little sets, but they’re for car camping—not backpacking! If you have to carry this on your back for thousands of miles, you really don’t want to carry more than one pot. A frying pan or drinking cup is an unnecessary luxury.
Titanium—it’s expensive. If money is no object, by all means, get a titanium pot for your backpacking adventures. If you’re doing a thru-hike or find yourself backpacking for months or years and get serious use out of your cookset, it might be a good investment. If you’re out in the woods a couple of weekends each year, however, just buy a cheap pot. Aluminum is still pretty light and works well.
My pot has a built-in handle with it. If your pot has a detachable handle, you’ll obviously need to pack it inside the pot instead of folding it back along the outside of the pot like I do.
For just myself, I find a 900mL titanium pot works great.
Weight: 3.0 ounces